Saturday, August 4, 2012

Seasoning Wood Utensils and Cutting Boards

Wood Cutting Boards


Before you cut anything on its wood surface, you should "season" the wood. "Seasoning" your cutting board means that you'll apply a coating of oil to protect it.

The oil will help keep food particles out of the pores of the wood. It will also help the wood resist stains and odors. And, it will help prevent the wood from drying out and shrinking. Don't use a cooking oil, though, as it will turn rancid over time. Instead, you'll want to use walnut or mineral oil. Walnut oil is usually the choice pick since it's 100% natural.  However, if you or someone in your family is allergic to nuts, then you'll need to use mineral oil instead. 

Wood utensils  should be treated in the same way and NEVER put them in the dishwasher. 


It is also a good idea to treat wood rolling pins in the same manner, just wait until the oil soaks in before you use it.

Do NOT use cooking oil to treat wood it becomes rancid after a time.

Friday, August 3, 2012

Tips For Food Transport

Anyone that cooks often transports food to various places and activities, Potluck Dinners, Family Reunions, Church Picnics, and Food for the bereaved, just to name a few.  Here are some tips to make the process easier and hopefully gets your food to its destination intact.    

Use A Cooler

Use a cooler to transport HOT foods as well as cold.  To keep food hot, line the cooler with your tablecloth or dish towels (this insulates as well as keeps food from sliding) and place hot food in cooler.  This works much better than a regular box and keeps the food hot until it gets to where you are going.  Use a separate cooler for cold items.

Buy Dishes at Yard Sales

Buy plates and pans at yard sales, garage sales, and thrift stores... These are usually less expensive than disposable plates and pans and can be left behind or passed on.  The next time you take food to the bereaved or a funeral, use a plate bought at a yard sale to take a cake or a container that you picked up.   Attach a tag that you have written a message such as "This plate does not need to be returned fill it up again and pass it on"  The recipient will be grateful that they don't have to worry about getting it back to you and you saved money by not having to buy aluminum or disposable containers and you don't have to worry that you will not get Grandma's caketaker back.

Take your own plates and eating utensils

Once again, buy plates and eating utensils at yard sales and thrift stores, take these with you on church picnics and other outings.  It is much easier to eat from "solid" plates than disposable, also consider that you are saving the planet by keeping foam and paper out of landfills.  Take along extra to share with others.  Place them in a plastic bag and tote back home to be placed into the dishwasher, then place them into the cooler that you used so that they will be ready for the next trip. (hint: these do NOT have to match)

Plan What Food You Take

1.  Is it easy to transport?
2.  Does it hold up well enough to be eaten later?
3.  Does it require minimum heat/cold?
4.  Will it look as appetizing once it gets there as when it did out of the oven?
5.  Take with you any serving utensils that are needed.
6. A wet dishcloth sealed in a zip lock bag always comes in handy.


Pies

Tinfoil is your best friend when transporting pies. If you're transporting just one pie, take an extra metal pie tin, flip it upside down and use it to tent the pie. Then seal the edges of the two pie tins together with a strip of tinfoil. Just to reiterate: You don't want a pie to hit you in the back of the head if you get in an accident, so secure it in the trunk. Use the grippy-drawer-liner technique to keep the pie from sliding around, or better yet, stash it in the laundry basket next to your casserole.
To transport two pies, place them side by side on a baking sheet, wrap tinfoil around the pies and baking sheet, and then secure the tinfoil around the baking sheet's edges. Store the baking sheet in your trunk with a grippy drawer liner under it to keep it from sliding around.

 All Those Yummy Leftovers
 
If you're going to take some goodies back home, be prepared and arrive with your own plastic storage containers and zip-close plastic bags, also take a roll of aluminum foil. Pack a load of disposable plastic containers in a reusable fabric bag. You can pack the containers full and have a convenient tote at the ready to carry them to the car.


Thursday, August 2, 2012

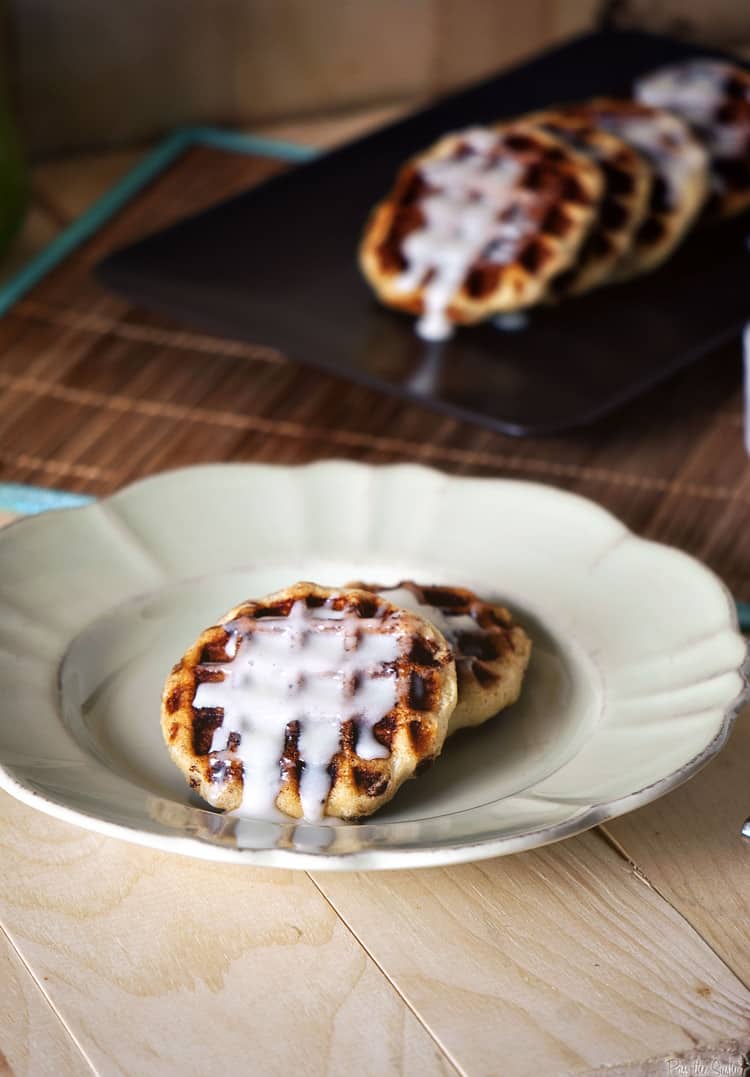
Cinnamon Roll Waffles

I found this recipe and decided to give it a try this morning, they were wonderful and so easy.


Ingredients:

  • 1 can Pillsbury Grands refrigerated cinnamon rolls with cream cheese icing
  • 1 cup confectioners’ sugar
  • 3 tbs milk
  • 1 teas vanilla

Preparation:

Preheat your waffle maker and coat with cooking spray substitute. Remove dough from can.
Place one roll in the center of your waffle maker  Close and cook for 3-4 minutes.
Whisk together the icing from the package, confectioners’ sugar, milk, and vanilla until smooth and serve over hot waffles.

Wednesday, August 1, 2012

Easy Yeast Rolls

(1/4-ounce) package active dry yeast
3/4 cup water water (98 to 105 degrees F)
2 1/2 cups plus 1/2 to 1 cup biscuit mix
1 tablespoon sugar
1/4 cup (1/2 stick) melted butter

 
Preheat oven to 400 degrees F. 

Dissolve the yeast in the water. Put the 2 1/2 cups of biscuit mix in a large bowl; stir in the sugar. Add the yeast mixture, stirring vigorously. Sprinkle the work surface generously with the remaining 1/2 to 1 cup biscuit mix.
Turn the dough out onto the surface and knead well, 15 to 20 times. Shape the dough as desired. (I shape heaping tablespoons of dough into balls). Place on a lightly greased baking sheet, cover with a damp cloth, and let rise in a warm place for 1 hour.
Just before putting into oven, brush rolls with melted butter. Bake for 12 to 15 minutes, or until golden brown. Brush the rolls again with melted butter while they're hot.

My Grandmother's Canning Kitchen

Many times when I am working in my canning kitchen I think back on my grandmother's canning kitchen.  It was called the "summer kitchen".  This room was on the back of her house, I have no idea what it was before it was turned into a kitchen or if grandpa had built it on to the house, but this room seemed to be made especially for what it was used for.  It was a bright and airy room with plenty of windows, for these were the days before central air conditioning.  This room was used in the summer so that the house would stay cool while grandma was cooking and preserving all the wonderful things coming out of the garden.

The Summer Kitchen seemed to have endless work space with counters and tables worn smooth from years of cutting, slicing and chopping.  The ever present coffee pot was always on the back of the stove, no one ever came to grandma's back door without being offered a cup of coffee and a bite of whatever was cooking at that time.  I also remember a bottomless cookie jar that held baked goodies for the children and any adult that came through.  There was a door that led downstairs to the cool dark recesses of the cellar under the house.  This is where the bounty of the summer was kept and I was always captivated by what could be found down there, row upon row of canned goods, potatoes and other "root" crops.  The dried fruits and vegetables were kept up in the attic. 

It seemed like the summer kitchen had "seasons",  every thing that went on in that kitchen was dictated by what was "in season", blackberries, strawberries, peaches, tomatoes, corn and green beans.  This room was made for work but grandma and the aunts would always find some fun to have, neighbors would stop by and help or just sit and talk, there always seemed to be children passing in and out just to see what was "on the stove".

When I moved into my house some forty years ago I felt like a canning kitchen was a little old fashioned so I used my regular kitchen to do the things that needed to be done in the summer.  My house had a large laundry room with a sink in it, I found myself using this room as an extension of my kitchen until I realized that I needed to rethink the canning kitchen.  After all, I had a large laundry room with space that wasn't used very much, only when I was doing laundry.  I guess you can say that my canning kitchen evolved.  First I moved the washer and dryer to a more convenient place in the house and replaced the sink and added a counter with plenty of work space and placed a table in the middle of the room.  I used the room like this for a while because it provided a great place to wash and prepare produce before transferring them to the "real" kitchen.  I then added a used stove.  Through the years my canning kitchen has evolved into a very pleasant work room with a dishwasher and two freezers, a chest type and an upright.  I by no means spent a lot of money "redoing" this room.  I bought used appliances (all but the freezers) and did it over a period of years, not all at once.  Now I have a room that I can truly say is one of my favorites, one that I feel my grandmother would be comfortable walking into and getting down to business.

A Summer Kitchen

As I look out my kitchen window, while washing a few dishes left over from breakfast, I reflect on what a busy place my kitchen is in the summer.  I look out over the garden and see all of the vegetables that will ripen and need to be put up for the winter.  At times it seems that it is a lot of work, but in the middle of winter when you open that jar or get something out of the freezer that taste so fresh, it is well worth it.  Even if you do not have a garden, many farmer's markets sell fresh produce and most of it is grown locally.  You do not have to buy or harvest bushels of produce to have good things to eat this winter.  Can and freeze in small batches, its much easier than doing it all at once.  Make a few jars of  jam or jelly...  you will be surprised at the sense of accomplishment that you get from just two or three jars that you made yourself.  We will go into detail in later posts on how to can and freeze produce, and make jams and jelly.  Stay tuned!

A Bakers Secret... Cooking Spray Substitute

Here is what bakers use to keep baked goods from sticking, its made from ingredients that are easily found in any kitchen.

1/2 Cup Vegetable Oil
1/2 Cup Shortning
1/2 Cup Flour


Mix ingredients until fluffy using a mixer, pour into a jar with a lid.  Use a pastry brush and liberally coat baking sheets and pans.  (there is no need to flour pans after using this)  I use this for any recipe that calls for a greased, or greased and floured baking dish.